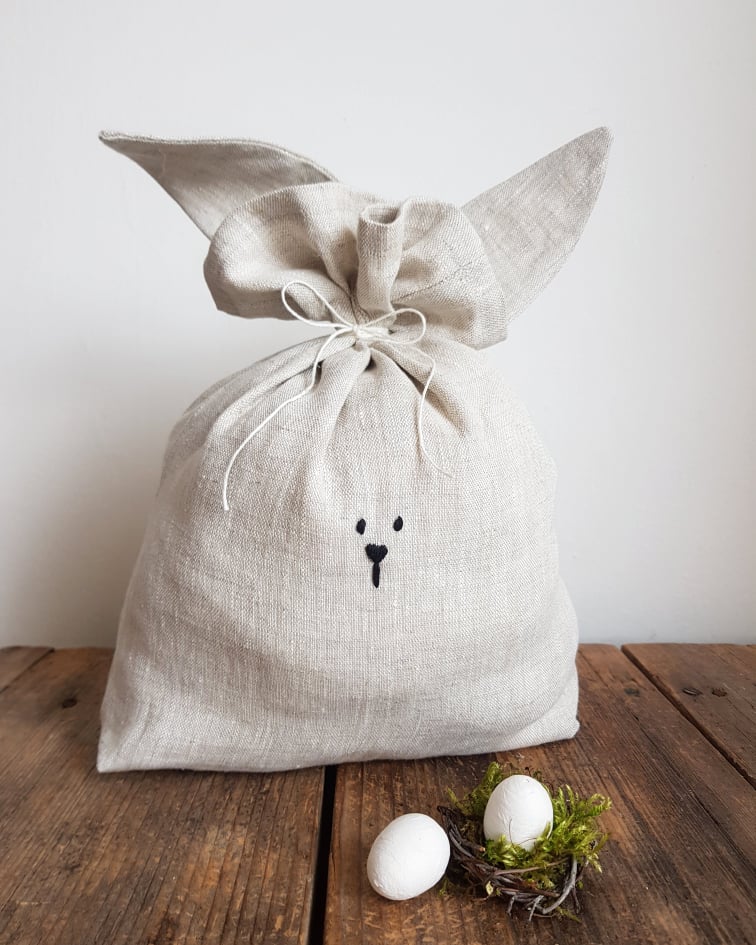
FABRIC BUNNY BAG
Fabric Bunny Bag
Use up old fabric or clothes for easy seasonal craft
Making fabric bunny bag is a great way to use up any spare textiles you have at home! These may be scraps from sewing projects and also old clothing or even bedding. For something like this bunny bag it’s not necessary to invest money to get the material. So many shirts, pillow cases or tea towels have already been made and you’ll surely find one of those in your home that you don’t use! I love to recycle old textiles not just because it’s affordable but because reuses what has already been made.
Simple DIY Pattern
To make the bunny bag you will need approx. 3 rectangles of fabric. One for the front, one for the bag and one to fold and cut out the ears. At the end of the easy tutorial bellow you will have a lovely seasonal and sustainable bag that is perfect for Easter treats! It works beautifully as a basket and can be used later as well for toys, snacks, you name it!
More amazing Easter & Spring crafts:
FREE Printable seed sachets
Beautiful Minimalist Clay Decoration for Spring Branches
Amazing Easter Egg Decorating Ideas
Fun & Easy Spring Crafts
FREE Printable Easter Coloring Pages
Delicious Homemade Carrot Cake
Fabric Bunny Bag
You’ll need:
- three 25 x 40cm rectangles of fabric
- sewing thread in complimenting color
- scissors
- sewing machine
- embroidery needle
- black embroidery thread
- twine to tie the bag
Instructions
Making the bag
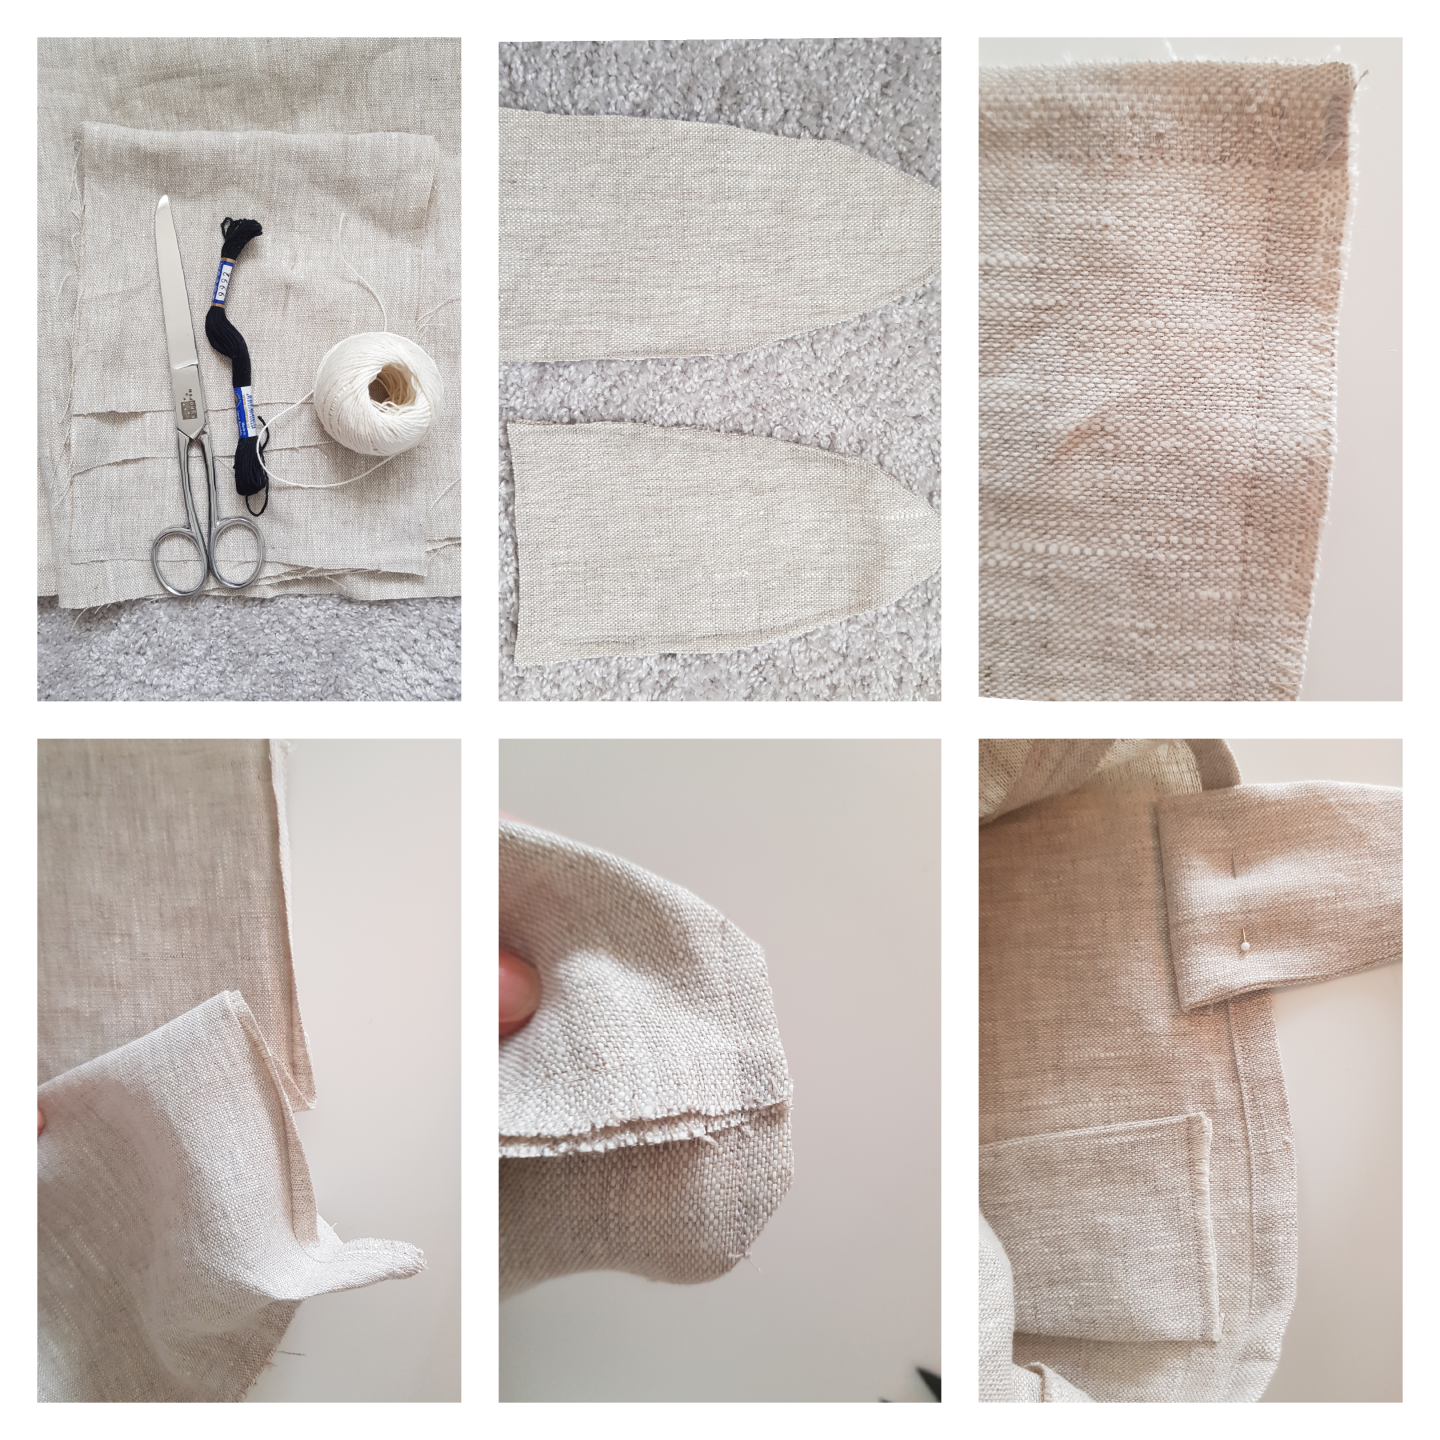
Firstly, cut out three rectangles of fabric as per the measurement above. Remember to add 1/2 an inch seam allowance. Use a dense zig-zag stitch to stitch around all raw edges to keep them nice and intact. My fabric was linen which looks the same from both sides but if you use patterned fabric, watch out for the right and the wrong side.
Place two rectangles right sides facing each other and stitch around the edges approx. 1/2 inch away from the edge. Begin stitching down the right long side, continue across the short bottom side and then up the long side on the left. Them take on of the new bottom corners and fold and stitch as shown, across the initial corner. Repeat on the other bottom corner as well. This will form a bottom of the bag which will allow it to stand nicely once filled. Then hem the top edge of the bag for nice finish.
Attaching the ears
The last step is to attach the ears. Take the third rectangle, fold it right sides facing each other and trace a couple of ears onto the double fabric. Cut them out including the seam allowance and stitch each, leaving the bottom open so you can turn the ears inside out. Trim the tip and turn the ears inside out, then press them flat. Attach them to the top edge of the bag as shown – first facing inwards and then folded upwards and stitched over again.
Embroidering the face
Last touch is to stitch a couple of eyes and the nose onto the bag by hand. Use a simple embroidery needle and a piece of black embroidery thread. When finished, fill the bag with goodies and tie the top with a piece of twine! You can also add a little tag with a loving note or a joke!

Disclaimer: This article may contain affiliate links. For more information visit our Terms & Conditions page.
